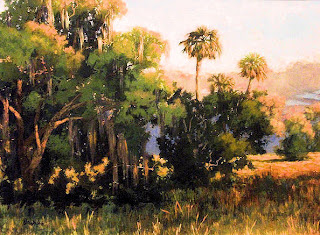
Many beginners try to put the sky into the painting and then struggle to put trees and objects over it. I like to do the opposite. I like to plug in the objects roughly and then plug in the rough sky through and around them. I never work one part of the painting more than any other. I might go back into the sky two or three times during the painting process, correcting and adding here and there, as the tree masses develop. At the end, I will go in and do sky holes and adjust the existing edges between trees and sky.
Sky holes should not be too many or too few and they should not be too ordered. Random placement, unevenly spaced, more at the top of the tree line and a variety of shapes is best.
Your sky holes will be more realistic if you change the value slightly darker than the rest of the sky. I tend to darken more with small sky holes that are further down into the tree mass and less as the sky holes are near the top of the tree mass. Also, larger sky holes will have slightly lighter value than small ones. This is because more light is going through the trees in larger holes. Keep in mind that the more depth and atmospheric condition, the softer the sky hole will be.
The last thing I do is to take a large flat dry brush and softly touch the brush to the sky holes, one at a time, just straight onto the canvas and lifting straight off. This will soften the edgework just a tiny bit but will not disturb the color and value.

No comments:
Post a Comment
Note: Only a member of this blog may post a comment.