Monday, December 30, 2013

Heritage and Champion Trees


Painting in progress
20x24 inches
Oil on canvas
http://www.lindablondheim.com

Notes From My Tree Painting Journal

The above painting is a champion Cottonwood tree in Texas. My project for the year is to do a series of champion and heritage trees of the south paintings. This is a project I'm excited and challenged to do. I plan to paint champions from Florida, Georgia, the Carolina's, Virginia, Alabama, Mississippi, Louisiana, and Texas. 

This will allow me to stretch my skill building study and to honor these great trees. I will enjoy researching their stories and histories. It might make a nice book. who knows? This should keep me busy, along with my Artist and Residence Project. 2014 is going to be a great year for painting trees.


Sunday, December 22, 2013

My Strategy For Tree Color Mixing

 
Notes From my "Ask Blondheim" Column
 
 
I write a question and answer column on Facebook and my Art Notes Blog. This topic may be useful for Florida or Southern tree painters. Naturally each tree painter uses their own technique and mixtures. I paint north Florida most of the time and these mixes work for me.
 
Linda, What is your favorite palette for mixing tree canopies?

Sandi,
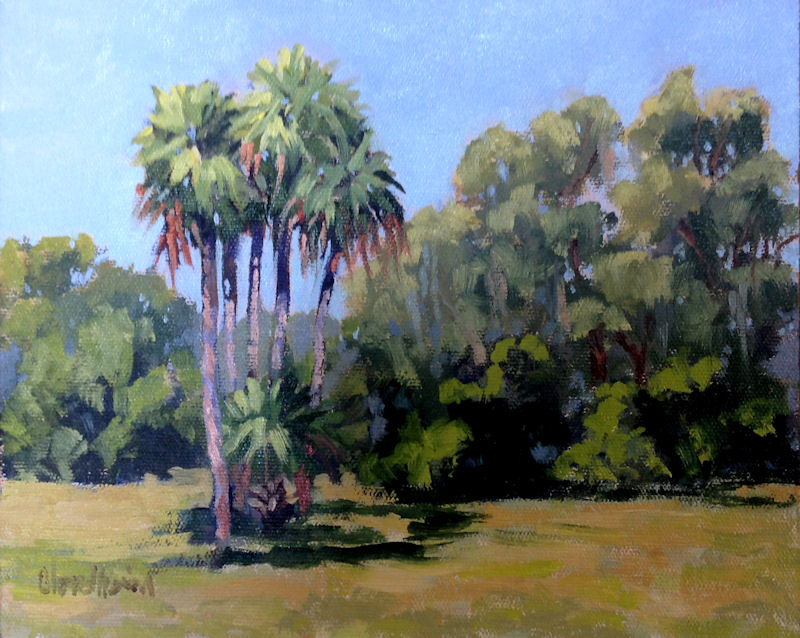
A lot depends on where you live as to the best color for tree canopy greens, as well as the season , time of year.  Here in north central Florida, I like to use a combination of Ivory Black, Ultramarine Blue and a bit of Cadmium Yellow medium in winter for the darkest parts of the canopy. As I add color and light to the branches of leaves, I add more cadmium yellow and less black to the mix. I will also use various warms as needed, such as cadmium orange, yellow ochre, and cad red to the mixture to warm it up for winter and fall. Slow and gradual adjustments in the color mixes work great for me. You can also make nice darks with trans red oxide and ultramarine or cad red deep with sap green.

I have found that my favorite green mix for Live Oak trees is either ultramarine with yellow ochre or thalo blue red shade with yellow ochre. As light intensifies in some areas of the canopy, I begin to add a bit of cad yellow medium or cad orange to that mixture, but not over doing it.

For summer mixtures, there is more cool green, so I switch to cadmium lemon yellow and ochre for my mixing yellows, and ultramarine and thalo for the dark cool greens. I stay away from black for summer painting, unless I want to mix true grays, because the greens are too olive with black for summer, when the canopies tend toward a blue green. Remember to warm your greens use the warmer part of the color wheel like reds, oranges and warm yellows. To cool your greens use more blue and cooler yellows. If your mixture gets out of control and too intense, use black to make a grayer green or red to tone down the intensity, just a bit.

For trunks, I use black, white, cad red light, cad orange, red iron oxide, UB, in various mixes. I like to add a blue cast to the dark edge and a blue gray to limbs moving away from the viewer to show atmospheric and distant quality to the limbs. Here in the south, there will be limbs covered in various green mosses, so a bit of cad yellow or ochre will take care of that. I usually will lighten and soften limbs and twigs that reach up into the sky, so there is a softer transition in that part of the canopy.

Have fun experimenting and and thanks for your question.
Love,
Linda


Tuesday, December 17, 2013

Repairing Frost Cracks in Trees

http://www.lindablondheim.com

Notes From My Tree Journal

I got a request from a reader about winter damage from trees. This is the information I found:

Frost cracks are not actually caused by frost, but by fluctuating temperatures. The cracks are most often found on the south or southwest sides of trees, which get the most direct sunlight. On a cold, sunny day, the sun warms the bark and wood of the tree, causing them to expand. At night when the temperature drops rapidly, the bark cools faster than the wood beneath, forcing the bark to split vertically as it shrinks over the expanded wood. This is most likely to occur on trees with wounds that have already weakened the bark, especially if they are young trees or trees with thin bark. These cracks are rarely fatal to the tree and can be minimized.

1

Examine the crack in the tree bark. If the sides of the split are smooth and the bark is still firmly attached to the tree, do not do anything. The tree will eventually form a callous over the crack.

2

Remove any bark that has separated from the wood of the tree. The bark will not reattach if left on, but will prevent the tree from callousing properly. Cut the separated bark from the tree with a sharp knife. Make sure you do not cut into the tree wood, but only through the bark layer.

3

Shape the wound while you cut to resemble a skinny, sideways football with the pointed ends at the top and bottom of the wound. This shape will make it easier for water to drain from the bottom of the wound rather than collecting on the bark.

4

Check the frost crack periodically in the spring and summer to make sure no organisms are invading the tree through the open wound.


Thanks to http://homeguides.sfgate.com/fix-frost-crack-tree-74301.html for this information.


Saturday, December 14, 2013

Red Cedar

Red Cedar at Little Talbot Island
9x12 inched
Oil on canvas

Demo in front of my studio

Notes From My Tree Painting Journal

I've recently started doing 2 hour tree painting demos on the sidewalk in front of my studio. It is a lot of fun and I meet lots of people who enjoy watching. I turn on my IPad radio app and listen to Billie Holiday and Louis Armstrong while I paint. I use the reference photos I have on my photo app for the paintings. People really enjoy it and I like the challenge of having busy people stopping to watch for awhile. 

As you probably know, I am a big Red Cedar fan. I find them very challenging to paint. They are lovely wild trees on the coast where I usually find them. They are often twisted by the rain so the trunks bleach out. The canopy is often pushed away from the constant wind. The canopy is a rich green, highlighted in the sun with cool yellows. The fine needles point in all kinds of layers and directions. Great painting fun and frustration at the same time. 

Just a yummy, beautiful specimen in the family of our beloved trees. 

Thursday, December 12, 2013

Line VS Mass

Study at Fair Oaks 
8x10 inches
Oil on panel
Study at Fair Oaks
8x10 inches
Oil on panel

Notes From My Tree Painting Journal

All tree painters have their own approach to constructing trees. I am a mass painter by nature. I see large shapes when I paint. I look for positive and negative shapes and their angles. There is very little line in my painting until the end of the painting when I add a few limbs and moss to the trees. My paintings start as abstract shapes and progress into more recognizable objects near the end of the process. I am looking at light and shadow as shapes throughout the process as well. I use lost and found lines here and there to lead the viewer around but mostly masses.

I have a friend who I would call a line painter.  He uses hundreds of lines throughout his paintings to form eventual masses of lines. An interesting process. His process is slower than mine and intricate. I think all painters are biased naturally in one or the other. He sees lines, I see large shapes that progressively get smaller.  Which is right? Both of us. 

Monday, December 9, 2013

Sky Holes


Notes From My Tree Painting Journal

I got an email from a reader, asking me about how to paint sky holes in trees. I imagine that all kinds of painters will have all kinds of methods to paint sky holes. After many years of painting trees and practicing, I have found that my method works quite well.

I try to vary the shapes and sizes of sky holes to make them look more natural. The larger the sky hole is in the canopy, the lighter it will be toward the center. The smaller the hole is, he darker it will be because light will not pass as easily in a small space. I premix two slightly different tints of light sky color, one for outside of the canopy and the slightly darker version inside of the tree canopy for sky holes.

You should also be aware of problems with tangents (artificial stops) when painting sky holes. For example, if you are putting a sky hole next to a limb, be sure to extend it to the other side of the limb so that it continues. it will be a tangent if you only place it on one side of the limb. I try not to make the holes the same shape on both sides of the limb.

After I have put in my sky holes with oils, I take the flat side of a soft brush and gently lay it parallel on the canvas over the holes and pull it straight back. This slightly softens the edges of the holes making the edge transition softer between canopy and light. It will look more natural and not pasted on.

For acrylics, I wait until the sky holes are dry and then wash a dark blue over then to tone them slightly darker than the light outside of the tree canopy.The wash must be very thin.

The important thing about sky holes is to make them vary as much as possible and to look as natural as possible. There will be more holes higher in the canopy and fewer as you go down the tree. Study trees when you are out and look at their construction.


Friday, December 6, 2013

Winter Live Oak finished

30x40 inches
Oil on canvas
http://www.lindablondheim.com

Notes From My Tree Painting Journal

I've been working along on this painting for about two weeks. I finished it yesterday and framed it today. I sure enjoyed it and I'm fond of this winter palette. It is nicely harmonic I feel. I worked on learning some technique with the distant tree line in this painting. I left it fairly dark, with very close values in the canopy, moss and lower area of the tree masses in deep shadow. 

In January when life is not so busy, I want to dedicate 2014 to more tree study, focusing on learning some new species of trees. I want to study Sycamore, Dogwood,  Swamp maple, hickory and a few less common trees. I have to expand my knowledge about painting trees. I have a lot to learn. 

Saturday, November 30, 2013

Live Oak in Progress

Live Oak Tree 
Work in Progress
30x40 inches
Oil on Canvas
http://www.lindablondheim.com

Notes From My Tree Painting Journal

I've not had as much time to paint this month. Lots of activities, but I do get at least an hour a day. I started this painting in the painting studio about a week ago. I moved it to my loft studio, where I'm beginning to make some progress on it. The dry prairie behind the tree is sometimes a pond. It gets quite large in wet years with beautiful lotus and lily pads. I really love it the most as a dry prairie. The grasses are really beautiful. Winter is my favorite season to paint. Long about the time that most of the leaves have fallen, and just a few bright spots of gold, yellow and orange remain, I love that look to the land. 

I recently did a large commission of one of the trees of this pond. I wanted to paint the same location as it looks now in early winter. I guess if I keep painting it enough, I'll get it right eventually.

My palette for this painting:

Cad Red Light
 Red Iron Oxide
Raw Umber
Ivory Black
Titanium White
Windsor Blue
Ultramarine Blue
Cad Yellow Medium
Yellow Ochre

Wednesday, November 20, 2013

Fish Prairie Trees


Fish Prairie Trees
40x48 inches
oil on canvas
 
Notes From My Tree Painting Journal
 
 
Each year in the fall or winter, I do a large painting of Fish Prairie. It is my favorite Florida prairie, quite small by other prairie standards, and not accessible to the public. It is rimmed by privately owned farms. Lucky me, it is rimmed by Fair Oaks in Evinston, where I am artist in residence. The staff at Fair Oaks kindly mows paths back on the prairie for me to paint. I can travel around the prairie in my favorite blue golf cart. Three weeks ago the yellow flowers were in full bloom on the prairie, providing a carnival of color along with the lovely tall, wheat and rust colored grasses. The Bald Cypress have dropped a lot of their leaves now. It was not the best year for tree color.
 
 
Naturally, I took artistic license with the scene, moving trees around and fitting in the grasses and flowers where I wanted to place them. I liked the idea of some of the trees coming forward stretching out of the picture plane and the play with strong value asymmetry of the tree colors, putting them in light and dark camps across the scene. As always, I love doing the big tree paintings!

Friday, November 15, 2013

More Tree Painting

http://www.lindablondheim.com

Notes From My Tree Painting Journal

I been busy painting trees in November. I started with a giant Live Oak Tree commission in October, finishing it up just in time to start the above painting about ten days ago. I've been able to get out to Fish Prairie for about two weeks now to see it transition from summer to fall. It is a glorious place for me and I spend many happy hours there in fall and winter. Spring and summer are hazardous due to snakes and swarms of Mosquitos. 

Two weeks ago the yellow wildflowers were in profusion on the prairie. I do a large painting of this prairie once a year as a joyful mission. This year I chose fall instead of winter, as I wanted to include the wildflowers and rich color before everything turns either gray or green for winter. 

This is a sapling prairie, not flat and vast like others in this area. It is small and full of small cypress, Hickory and Bay trees, as well as cabbage palms and a number of Palmettoes, so there is no shortage of interesting small trees. The owner of Fair Oaks has thoughtfully carved paths through the prairie so I can navigate pretty easily through the prairie in a golf cart. 

This is kind of a wonderful secret place for me. Whenever I want to have a quiet place to explore and watch the birds or paint, I go to Fish Prairie. It is rimmed by privately owned farms so there are no tourists roaming around. I love it so much!

Saturday, October 26, 2013

Commission almost done

Close up of the commission grasses

Notes From the Loft Studio

Today my collectors came in to view their painting. They liked the painting but wanted a bit more variety and flowers in the grasses which I did this afternoon.  When I get back to the studio on Wednesday, I'll turn the painting upside down and paint the bottom edge. This is an extra deep gallery wrap canvas with edges of 2.5 inches deep. I am continuing the painting around the edges for a seemless finish. 

Next Saturday they will do the final viewing and my dealer will deliver and install the painting in their home. Yay! These collectors are very nice people and have been very easy to work with. I am very grateful to them. 

My dealer told me today that last night someone inquired about a 40x60 commission of one of my small paintings, so fingers crossed that they will committ to a painting. That seems to be a trend for me now, that people want large versions, inspired by my current paintings in the studio. I don't mind. I love to paint. 

Friday, October 25, 2013

Update on the Tree Commission


36 x 61 inches
Oil on canvas

I'm ready to show this painting to my collectors, hoping they will be pleased. I only have the bottom edge to paint, after the other edges are dry. I love hanging big paintings on the featured wall at my studio. My collectors will look at it tomorrow. I really love painting big trees.

Thursday, October 17, 2013

Let the tree commission begin!


http://www.lindablondheim.com

Notes From My Tree Painting Journal

The above canvas and small painting are the beginning to my next tree commission. I took my collectors ideas down in notes, then did 3 small oil paintings to show them. The above painting suited their desires. Now I will begin the real painting this weekend. There is no real deadline so that helps me to wander through the painting without pressure. I hope to complete the painting by the end of November. The painting will have more of the tree canopy and more detail.

Tuesday, September 24, 2013

Fall and Winter Palette

 
Notes From My tree Painting Journal
 
 
I've been working on my fall and winter palette for this year and 2014. I think I finally have what I want. It took me a few weeks to sort it all out. The painting above is Fish Prairie, one of my favorite places to paint, particularly in the cool months. Many of the trees lose there leaves on the prairie and I love the subtle colors I find there through the cold months.
 
 
I live at Fair Oaks for a week every year in February. That is when the prairie is the best. I look forward to painting the lovely trees there in a few weeks.
 

Thursday, September 5, 2013

Back to Trees


www.lindablondheim.com

Notes From My Tree Painting Journal

I've had a few days to paint trees this week. This painting was done with a cooler palette. I've been playing around with my winter palette, but I wanted to do this painting from a summer reference photo I took back in June.

Soon the fields and trees will take on the colorful dresses of Fall. 

I don't have the winter palette tweaked quite right. I always start a seasonal change in my palette early, so that by the time the season has changed, I am ready and comfortable with it.

Sunday, August 18, 2013

Field One Trees

 
Notes From My Tree Painting Journal
 
 
I have painted this tree group several times. It is so unusual in shape that I have to keep painting it from various angles and in different seasons. I did this painting a week ago, here in August. There are still a few purply weed flowers scattered round the fields this late in the summer. I believe the trees have been trimmed some to make this opening better for the palm, but perhaps not. Trees do grow in unusual configurations. It is hot and heavy with humidity and frequent rain this year, so not at all comfortable this time of year for painting. I have gotten into the habit this month of driving around the fields in a golf cart with my Ipad to take reference photos and then going upstairs to the studio to paint. I will get back to painting on location in mid September. it will still be hot, but some drier by then with less humidity, if we are lucky.
 
 
This painting is 16x20 inches, oil on canvas. I used the following palette:
 
UB
Titanium White
Ivory Black
Cad Yellow Medium
Thalo Red Shade Blue
Yellow Ochre
Red Iron Oxide
 
Summer was fun but I am so ready for my wonderful fall weather.


Tuesday, July 2, 2013

Field One Summer II


Notes From My Painting Journal
 
 
I've been quite busy painting fields this summer, a slight departure from my focus on trees, but of course, the trees are part of the scenery always here in North Florida.  Painting the fields helps me to practice brushwork and challenges me to not become too obsessed on my dear trees. The fields also challenge me to a better understanding of mixing greens, so very important to a Florida painter because we have endless greens, warm and cool and every temperature in between. The fields are full of green in the summer and the subtleties abound. Every texture comes to life in the fields and trees, so my brushwork skills improve as well. Oh how I love the landscape here in Florida!!


Friday, June 7, 2013

Repairing a cracked tree trunk


A Reader's Question

From time to time a tree blog reader sends me a question about care for trees. I always ask my arborist friends for their advice. The question was how to repair a damaged tree trunk that has split. This is from Meg:


Using a rope, pull the tree up to where the wound has closed. Drill a small hole through the tree and slide a bolt through it. Put some FLAT washers on each end of the bolt and lightly tighten the nut up. Using a very sharp knife, trace around the washer, through the sap wood. Loosen up the nut and remove the bark under the washers. Then tighten the nut back up. You'll need to provide some support to the tree for a couple of years. Put 3 stakes around the tree and attach some twine to the tree, using some tubing or old cut sections of a garden hose to run the twine through, around the tree.


Mowing Season

18x24 inches
oil on canvas
wood frame with copper trim
Available in my Loft Studio
4122 NW 16th BLVD
Gainesville, FL (next to Fresh Market)

Notes From My Tree Painting Journal

I caught this scene by accident with my I-Pad camera a couple of weeks ago. The tractor was just in the right place and the light framed the scene.I loved the dark tree on the right and the multiple textures throughout the scene. The trees were left simple and the emphasis on the tractor and strong light in that area. it was a complex and fun painting to do. The color is fairly rich in this painting compared to some palettes I use. I wanted to emphasize the rich greens of full on summer in Florida. I am quite fond of portals in my work and this scene was the perfect opportunity to use a strong portal in my composition. The trees set the scene.

Monday, May 20, 2013

Tree Vista Painting

Early Summer
18x24 inches
oil on canvas
You can purchase my tree paintings on my web site with free shipping, or at my 
Loft Studio in Gainesville, FL

Notes From My Tree Painting Journal

This was a great scene to paint with several spaces between trees. Creating the distance with textural and color temperature changes was a great and fun way to create the depth I needed in this vista. Add to that the painting was 18x24 inches and I did about 90% of it on location alla prima. The bugs were biting and it was humid, but I truly enjoyed the process.

I have been a bit out of sorts with color recently, so I have gone back to my favorite single primary palette for awhile to get myself reigned in. This is a palette that I love and have used for many years when I want to make color mixing easy. It is quite versatile and will produce quite a nice range. Here it is:

Ivory Black (Daniel Greene)
Titanium White (Gamblin )
UB ( Old Holland )
Cad Red Light ( Gamblin )
Lemon Yellow ( Windsor and Newton )

Any brand will work with the above palette.

My favorites are:

Gamblin
Old Holland
Windsor and Newton
Shiva
Daniel Greene
Grumbacher Pre-Test
Utrecht


Tuesday, May 14, 2013

Painting limbs, twigs, and branches


Notes From My Tree Painting Journal

This year in my quest toward excellence as a tree painter, I am studying limbs,twigs, and foreshortening in trees. This is an area often avoided by painters because it is really hard. I see lots of paintings of trees with limbs to the sides of the trees. I understand. It is  a struggle to learn these elements of trees and to do them well. I am on that path for the year to try and figure this out. 

Everything about painting trees is challenging really, from the roots to the scale as they rise up into the sky. It is like trying to paint a tall building correctly. Hopefully, my trees will get better and better as I struggle along, but painting is so hard that in a lifetime I won't figure it out. That is the good news!!

Thursday, April 25, 2013

Back From a Residency


Cedar Trees

Bird House

Notes from my Tree Painting Journal

I've been painting at a four day residency at BIrd Island on Florida's Gulf Coast. There are a variety of trees on the island, but Sabal palms, Red cedars and tall Long Leaf pines are the majority. This is typical of coastal islands in North Florida. 

The palms lean in the same direction, having been buffeted by the wind I imagine for many years. They, along with several of the pines and cedars are advanced in years.

The island is lush and left natural, but for the yard area around the house and the boat dock area. I managed to complete four 12x16 paintings during my stay. That is a good size for alla prima work with oils. Large enough to challenge me without being overwhelming. Since I had four days only, I wanted to spend my painting time efficiently and still get good paintings rather than slap dash studies. There will be a bit of touch up in my studio with better light, but they are just about done. I expect to spend no more than 15 minutes for touch up on each. 

This was a wonderful opportunity to study Florida's trees.


Sunday, March 31, 2013

More tree fun with oils


Notes From my Tree Journal

I've been enjoying painting the fields with new color and tiny wildflowers blooming everywhere. it is the perfect time to be out studying trees. The color is that impossible shrieking green that is so beautiful on site, but so deadly for a painting. It looks fake and unnatural if you try to duplicate it. I have learned to be judicious about overdoing the intensity of color in the spring.

I like to use the following to neutralize greens:

cad orange
yellow ochre
Naples yellow
ivory black
cad red light
raw umber
red oxide

Just a touch of the above will tone it down a bit and make it more manageable. Here is to spring and green!!


Saturday, March 23, 2013

A commission


Notes From My Tree Painting Journal

I finished this 40x60 commission this week. It was a good challenge for me because the palette is not what I usually do for tree work. The client has teal colored leather sofas and wanted the painting to be in harmony with their furniture. The challenge was coming up with the right mixtures to give it the colors that would create interest but not stray too far from the initial ideas for teal. The clouds were very important to the client as well as the teal color. They wanted a subtle, soft painting so I did not get caught up in a lot of detail in the grasses. I kept them soft and cool in temperature, using the trees for the most interest and texture. I moved the larger tree down forward into the field to create another interval and heightened its color and values slightly to create depth..

Tuesday, February 26, 2013

Observing Trees to Paint in Studio


Notes From My Tree Painting Journal


This is a painting I've wanted to do for some time. It is a favorite scene for me at Fair Oaks. It was the last painting I did at my residency there last week. I am back in my own studio for a few days and leave again to go paint the trees at Wekiva State Park for a week, leaving here on Sunday.

There was more than one angle of this tree group that was nice, so I may do another one of this scene in the future. Staying at Fair Oaks made it possible for me to drive out to the scene several times to sit and look at it for a bit between painting sessions. The longer I paint, the more convinced I am that really observing a scene rather than painting it is a good marriage between studio painting and the real outdoors. I enjoy painting on site but not as much as just observing and taking my ideas back to the studio to work on larger paintings. I have painted on location for about 25 years now and have gone through many experiences, good and bad paintings and gradually have come to understand that I am simply a better studio painter. I now think of plein air as research for studio work. It is fun, but simply a means to the end in my studio.

There is so much to learn about painting trees that I expect they will keep me occupied with practice for many more years to come, both on location and in my studio.

Thursday, February 21, 2013

Cusp of Spring


Notes From My Tree Painting Journal

This painting was a nice challenge. The digital image has a glare on the right half, so it looks washed out. I love painting these groupings of trees with their intertwined branches and limbs. It is always my favorite theme for paintings in between seasons. Just that week or two between the seasons is fascinating to paint. It is a reoccurring theme in my work.


Wednesday, February 20, 2013

Serenity Oak 3


Notes From My Tree Painting Journal

It took me about a month to do this painting, working on it for a couple of hours at a time when I was at Fair Oaks on Sundays. I am here for a week, so I have been able to focus my time on painting upstairs in the studio for several hours a day. This is the third painting of this particular tree. It is a difficult tree to paint. There are many overlapping sections of the trunk and it has split into two sections as they are want to do in their great age. It is a mammoth tree.  I think this is the most successful of the three paintings, though I like the other two as well.

I used the following palette for the trunks and limbs:

UB
Raw Umber
Trans Red Iron Oxide
Ivory Black
Zinc White
Cad Orange

For the canopy and grasses:

Cad Lemon Yellow
Trans Red Iron Oxide
Cad Orange
Sap Green- I use Daniel Green Sap Green. it is unique and much cooler and deeper than other brands of Sap Green
Thalo Blue
Titanium White

The painting is 20x24 inches, oil on canvas.

Today I will start a new tree painting.


Tuesday, February 19, 2013

Trees at Fair Oaks


Sample painting for commission client
10x24
oil on canvas

Field One Palms
8x10 inches
oil on canvas

Notes From My Tree Painting Journal

This week I am in residence at my favorite place in the world, Fair Oaks. Being an artist in residence there means that I can come out to paint for a day most any time I like, but to live there for a week is a once a year privilege. I can't tell you how much I look forward to this week in February each year. The time flies by so fast!!

I am working on several painting projects this time, including a sample painting for a 40x60 commission that is looming ahead of me in March. The canvas should arrive from my canvas maker while I am away from the studio. I use French Canvas for all of my commission paintings. They make high quality and custom sizes for me. I brought 18x24 canvases with me for this residency and I have a tree painting in progress already that I've been plugging along on in the last few Sundays. The weather has been quite cold here, so I go out for a little ride around the fields and take reference photos of trees and then go upstairs to the studio to work on paintings, rather than be miserable in the cold.

I am trending back toward oils again after a couple of years learning to master acrylics. I will continue to use acrylics for my loft studio work, because it is a retail studio. I don't want anyone to be turned away by the oil paint smell. I love it, but there are many who have allergies to the paints. Acrylics are cleaner and easier to manage there. I have begun to do oils alla prima and on location again, but will probably continue with both mediums on location.

The trees at Fair Oaks this year are lovely and graceful in their bare winter grays and umbers. I so love the palette for winter in Florida. I like the combination of ultramarine blue, raw umber and lead white this time of year for trunks and limbs and distant atmospheric trees. I can bias it cooler or warmer as I need to. Good stuff!!

Tuesday, February 5, 2013

Oil Field Notes


Notes From My Tree Painting Journal

It's been about two years since I used oils on location. prior to 2011, I was mostly an oil painter. I dabbled with acrylics for about 8 years before 2011. In 2011 I decided to get serious about studying with acrylics. I put my oils away for about 18 months while I learned to paint well with acrylics. Recently, I decided to get back to oils in the painting studio. I began to miss them. After all, I have been an oil painter since the age of 12.

The re-learning curve for oils has been steep, much more difficult than I expected. I am just now beginning to get some technique back with them. Last Sunday, I packed my pochade box with oils for the first time in two years and headed out to my favorite place on earth, Fair Oaks.  The above painting was the result. it still needs some tweaking and when I have time, I'll work on it a bit more. I accomplished what I needed to. It is clean, not muddy, and has decent color mixing. it gives me some self confidence that I can once again get out there with oils and get the alla prima job done. I am thinking of taking them to my next Paint Out. I'll practice with them at Fair Oaks for a week this month during my residency. I'll show you the finished painting soon.

Saturday, January 26, 2013

Field Notes


Notes From My Tree Painting Journal

I just returned from my residency at Merritt Island Wildlife Refuge. I saw thousands of trees out on the marshes and wetlands. One thing I do for myself is take field notes of trees that I am especially fond of, not always on location, but later on my computer. I find taking a lot of photos and writing notes on location to be pretty distracting, though it works for others. My habit is to just observe as carefully as possible with as few distractions as possible. I train myself to carefully consider the shapes, colors and textures of what I'm seeing and trying to store them away in my mind. When I get back to my office I can jot down these details while they are fresh in my memory. I will take a few photos of the most special trees I see to use later, but the field notes are very helpful.

One of the issues I most often observe are the changes over time to a region. I like to return to a location close to the same month or season each year to compare the extraordinary changes form year to year. This year all of the magnificent pines that were such a feature last year have been burned. They will leaf out again, but for now, look ghostly and sad. A completely different look to a year ago.  The water was much higher in the marshes and the color was different this year. There were many waterfowl but really about half as many as I saw last year. I learned years ago that each new season presents a completely different feel and vision to a landscape. It takes many seasons to understand a place and to fit into it's rhythm. 

Study the environment and you will ever be fascinated....

Saturday, January 19, 2013

Trees as Subjects for Color Mixing

Orange/blue and red/green

yellow/purple and red/green

yellow/purple and orange/blue

Notes From My Tree Painting Journal

I mentor a group of 10 painters. I give them weekly assignments and we have a meeting once a month to talk shop. Their latest assignment was to study various tetradic palettes. The above tree paintings are my own paintings from the assignment.

The one on top was done alla prima with oils, and the other two were with acrylics. The second painting was started on location at Fair Oaks, where I am an artist in residence. 

The third painting was done on an aluminum panel. That is a bit more challenging with acrylics because the panel requires more paint layers to start before the paint begins to grip the surface well. I use a medium tinted with pigment for the first layer and the problem is that I am impatient in not leaving it alone to dry. Once I get further into the painting it is easier. I do enjoy the challenge of painting on metal now and then. It is great fun to see the little spots of sheen from the metal as you walk around the painting. Copper and tin work as well and it has become a fad with some painters to use copper, though  the technique has been around for ages.

I am starting to get my technique with oils back again. I noticed with the top painting that I felt quite comfortable with the medium again. I used to be an oil painter exclusively for about 40 years before I discovered the advantages of acrylic. I studied with acrylics for 18 months exclusively and just went back to oils last summer. Now I try to do both each week to keep the skill level up. 

The Loft Studio is full of tree paintings for 2013. I have moved my coastal paintings onto the stair well to give the trees their just due as the celebrities of my year. Come on up to the loft and enjoy them.